

Ring video doorbells take between 5 and 15 minutes to install, though it might take a little longer if you’re completely lost on what to do. That’s what we’re here for. In this guide, we’ll break down the basics of the wireless, hardwired, and peephole installation methods for various Ring video doorbell models:
How to Install a Ring Doorbell

November 11, 2019

- Ring Video Doorbell (wireless and wired)
- Ring Video Doorbell 2 (wireless and wired)
- Ring Video Doorbell Pro (wired)
- Ring Peephole Cam (peephole)
Need help deciding which Ring to get? See our Ring Video Doorbell review.
Want a security system to use with your doorbell? See our Ring security review.
Before you start
Although Ring includes the required mounting hardware and a screwdriver in the box, there are a few other steps you'll need to take for a smooth install.
Charge your doorbell

Ring suggests charging your doorbell camera completely before mounting it. This practical advice means that you won’t have to recharge the battery prematurely after the install.
- Ring Video Doorbell: The USB charge port is on the back of the unit. The battery can’t be removed.
- Ring Video Doorbell 2: The charging port is on the top of the battery. Remove the faceplate and slide the battery out using the quick-release tab.
- Ring Peephole Cam: This is the same battery used by the Ring 2—the USB port is on the top of the unit. Remove the battery from the package.
- Ring Pro: This model doesn’t have a battery, so you can skip this step.
Prep a power drill
For the best results, use a power drill to attach your Ring’s mounting plate to the wall. This tool allows you to drill pilot holes for the included screws.

When you install the doorbell on a wood or vinyl surface, you need only the screws.
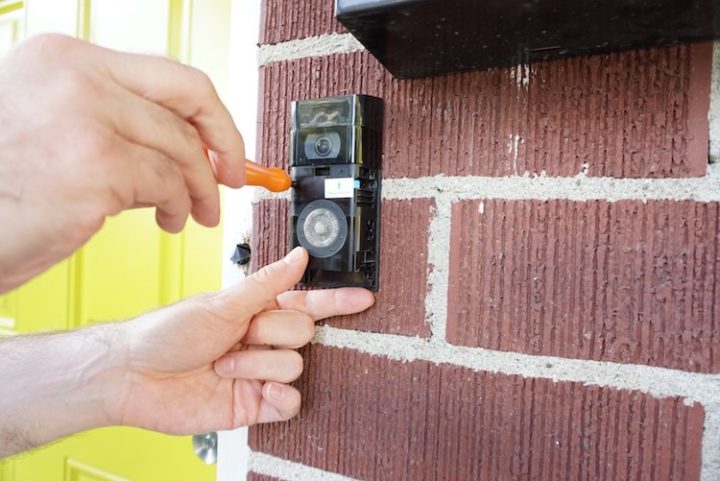
With hard surfaces like brick, stucco, and concrete, you’ll also need the included masonry drill bit and plastic anchors. Once you drill the pilot holes, place the included plastic anchors inside. A hammer is helpful for tapping the anchors into place.
Track down your doorbell transformer (if you’re doing a wired installation)
You can wire your Ring video doorbell directly to your existing doorbell chime. However, you’ll need to locate the doorbell transformer to check if it’s compatible.
Turn off the power first
If you plan to do a wired installation, turn the doorbell’s power off before working with the wires. You can do this from your circuit box.
Ring doorbells are compatible with AC transformers rated between 8 and 24 volts. If your existing transformer isn’t compatible, you may need to replace it. While replacing a transformer can be done as a DIY project, consider hiring a professional installer if you’re not comfortable doing electrical work.
Wireless install: Ring Video Doorbell | Ring Video Doorbell 2
Ring has three battery-powered video doorbells: the original Ring Video Doorbell, the Ring Video Doorbell 2, and the Ring Peephole Cam. The installation instructions for the Ring Peephole Cam are a little bit different, and we’ll cover them in a later section.
Ring Pro
While the Ring Pro requires a wired installation (details below), you’ll still follow the first few steps listed here to connect to Wi-Fi and mount it to your wall.
Connect to the Ring app
After you charge your doorbell’s battery, download the Ring mobile app and follow the setup and installation instructions. Here are a couple of things you should do before starting the physical installation:
- Take the doorbell to the door where you want to set it up and press the button on the front to test the Wi-Fi network connection. You should get a notification from the Ring app. If you don’t have any problems, you can install the unit right away.
- Don’t adjust any other settings (like motion detection) in the mobile app until after you mount the doorbell on the wall.
- If you have a poor wireless connection, consider placing a Wi-Fi extender somewhere between your doorbell and wireless router. Ring makes an accessory with a built-in Wi-Fi extender: the Ring Chime Pro.
Mount the doorbell on the wall
This is the most technical part of installing a Ring video doorbell. These instructions apply only to the Ring 2, Ring Pro, and original Ring Video Doorbell. Are you ready?
Ring Video Doorbell (original) mounting steps:

1. Take the mounting bracket and small level tool out of the package. Place the level on the mounting bracket at the top of the center opening.
2. Place the bracket in a spot about 5 feet off the ground. Use the level to ensure it’s straight.
3. Use a pencil in the four corner holes to mark for pilot holes.
4. Move the bracket and drill small pilot holes.
- If installing on concrete, brick, or stucco, use the included masonry bit and plastic anchors.
5. Replace the bracket and attach screws in the corners.
6. Optional step: connect to wiring. See section on Wired Installation for more details.
7. Place the fully charged doorbell on the mounting bracket by lining up the slots on the back. Push toward the wall and slide the unit down until it clicks.
a. If there’s no click, loosen the security screws.
8. Tighten the security screws using the special screwdriver included in the box.
The mounting process for the Ring Video Doorbell 2 and Ring Pro is slightly different than that of the original Ring Video Doorbell. We made a few changes to the above steps:
Ring Video Doorbell 2 and Ring Pro mounting steps:
1. Take the doorbell’s faceplate off, then take the whole unit (no separate mounting plate on this one) and small level tool out of the package.
2. Place the level in the small hole just under the lens on the front of the doorbell.
3. Place the doorbell in a spot about 5 feet off the ground. Use the level to ensure it’s straight.
4. Ring 2: Use a pencil in the four corner holes to mark for pilot holes. We say corner holes, but the two top holes are actually much lower. Ring Pro: There are only two holes on the Ring Pro, top and bottom.
Pencil problems

Our editor said the following about marking pilot holes: “My pencils were all too big to fit through the holes when I installed my Ring, so I used a narrow paintbrush dipped in some contrasting paint.”

5. Move the doorbell and drill small pilot holes.
- If installing on concrete, brick, or stucco, use the included masonry bit and plastic anchors.
6. Required (Ring Pro)/optional (Ring 2): connect to wiring. See section on Wired Installation for more details.
7. Replace the doorbell and attach screws in the corners.
8. Attach the faceplate you want to use and secure it with the security screws.
That’s it. You’re done. You can now go into the mobile app and customize your settings.
Wired install: Ring Video Doorbell | Ring 2 | Ring Pro
While the battery-powered models are easier to install, a wired installation doesn’t take much longer. Follow all of the same steps for a battery-powered installation that we listed above. There are only a few key differences:
Did you remember to turn the power off?
We know we said it already, but it’s easy to forget to turn the power off when you’re excited to get your new smart doorbell working. Avoiding a shock’s always a win.
- You need to turn off the power to your old doorbell. If you have a wireless doorbell in your home, it’s not compatible with Ring’s wired doorbells.
- Remove the old button.
- Prepare to install the video doorbell over the existing hole using steps 1 through 5 in the Mounting section.
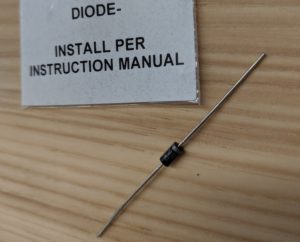
- Connect the diode (Ring and Ring 2) if your existing doorbell uses a digital chime.
- Connect the Pro Power Kit (Ring Pro) inside the case that houses your existing mechanical or digital chime. Check Ring’s support website to see compatible models.
With the power off, attach the doorbell wires to the screws on the back of the unit (Ring 2 and Ring Pro) or the mounting plate (original Ring). It doesn’t matter which wire connects to which screw since doorbells don’t use a polarized circuit.
Finish by attaching the doorbell as listed in steps 7 and 8 above. Turn the power on and test your doorbell button. You should hear the mechanical chime go off inside your home if you were successful.
Wired chime alternative
Ring makes a wireless chime accessory that works with all of its doorbells: the Ring Chime.
Peephole install: Ring Peephole Cam
Ring’s newest video doorbell mounts directly on your door in a rather simple process.
Ring Peephole Cam installation
- Charge the battery completely.
- Download the Ring app; this shows you a step-by-step installation guide and connects your device to Wi-Fi.
- Inside the box, you’ll find a flat piece of metal that Ring calls a Peephole Key.
- Use the Peephole Key to remove paint from the old peephole’s edges.
- Unscrew the peephole from the inside of your door using a counter-clockwise movement. There should be two gaps along the outer rim of the peephole where you can use the long, flat edge of the Peephole Key as a screwdriver. You may need to hold the peephole’s outside half in place while unscrewing.
- Remove the old peephole’s indoor and outdoor halves.
- Place the outdoor half of the Ring Peephole Cam in the hole where your peephole used to be.
- If the hole in your door’s too big, you can use the included adapter tube to make the Ring Peephole Cam fit more snugly.
- Take the cover off the indoor half of the unit before placing it over the tube of the outer half.
- Gently pull the small cable out of the tube using the attached tab until there’s no slack in the cable.
- Use the gray tightening nut to secure both halves of the video doorbell. You can use your fingers or the Peephole Key to tighten the nut. Check to make sure the outdoor half of the unit isn’t crooked.
- Connect the cable to the port on the indoor half, slide down the connector to remove slack, and insert the battery.
- Replace the cover of the indoor half.
Now you can set up the Ring Peephole Cam using the Ring app.
Paying someone else to install your doorbell
Although we consider this a fairly easy DIY project, we understand that you might not feel the same way. It will cost more to pay a professional to install your doorbell, but it’s easy to set this service up through Thumbtack or TaskRabbit.
Not interested in Ring video doorbells? Check out our review of the best doorbell cameras to see the competition.


